
Team and settings
Under Settings you manage the team, the guidelines, security, billing and the workspaces. Team, guidelines and embargo per show are for admins of the workspace; billing, security settings and workspaces are for owners and organisation admins.
Invite people
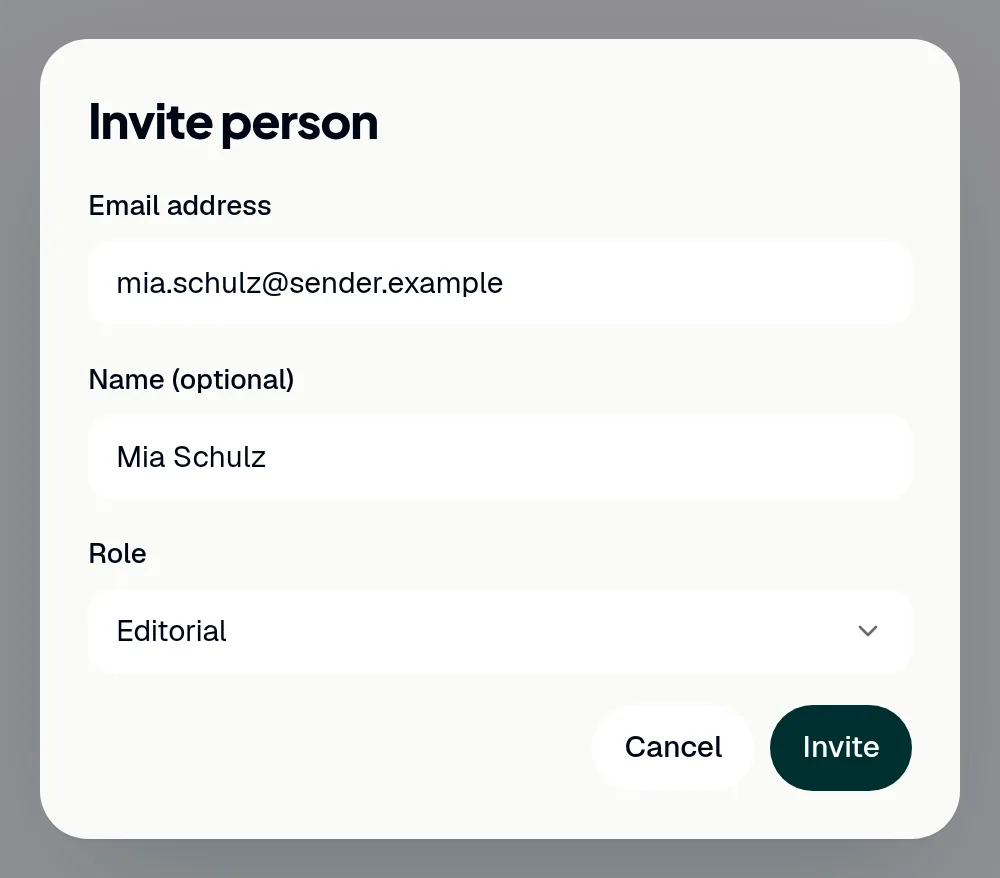
Admins invite people to the workspace. ShowBits sends no invitation email: you pass the note on yourself.
- Open Settings → Team & roles.
- Click Invite person.
- Enter the Email address, a name if you like, and choose the Role.
- Click Invite.
- Click Copy and send the note to the person, for example by email or chat.
- Click Done.
The person signs in with exactly this email address, with Google or a code by email, and accepts the invitation. Until then they show as Invited, and Remove withdraws the invitation. How many people the team can have depends on the plan; the tab shows how many seats are in use.
Roles and removing people
Each person has one of four roles in the workspace: Admin, Duty editor · approval, Editorial or Social media. Admins manage the team, the integrations, the brand kits and the guidelines. Admins and duty editors change the embargo of an episode and can have published posts deleted on the platform. With a duty editor in the team, approvals have two steps, see Approving clips.
- To change a role, choose the new one in the person's row.
- To remove a person, click the bin icon in their row.
- Confirm with Remove.
Admins change roles and remove people. A removed person loses access to the workspace; approvals and the audit log keep their name. Every workspace needs at least one admin.
Editorial guidelines
Editorial guidelines are included from the Business plan. They apply to AI copy, headlines, clip titles and the automatic clip selection, and the editor shows hints as soon as a text goes against them. Admins change them; everyone in the workspace sees them.
- Open Settings → Guidelines.
- Under Terms, enter a term under Instead of and the one your house writes under Write. Add term adds another.
- Under Blocklist, enter one word or phrase per line.
- Under Style guide, describe in free text how to address people, spellings or taboos.
- Click Save.
Words on the blocklist never appear in copy, titles or hashtags, and the analysis does not pick clips in which they are said. At most 200 terms and 300 blocklist entries are possible, each up to 80 characters.
Embargo for new episodes
Every new episode gets an embargo by the rule of its show, for example until the broadcast, or by the default embargo. Until it ends, none of the episode's clips goes out.
- Open Settings → Guidelines.
- Under Embargo per show, choose the show's rule: Until a weekday and time, Hours after the upload, No embargo or the default.
- Click Save.
Admins set the rule per show; a change applies to new episodes. The default embargo for shows without their own rule is under Settings → Security: Embargo for new uploads and Default embargo, changed by owners and organisation admins. Admins and duty editors change the embargo of a single episode on its page, see Adding episodes.
Security and audit log
Settings → Security shows the security settings of the organisation. No training on your data and Encryption are always on. Sign out everywhere signs your account out on every device, for example after losing one. The Audit log next to it shows who did what and when: sign-ins, password and two-factor changes, approvals with their comments, deletions, connections, roles, posts and more. Entries by System show what ShowBits did by itself, such as finished analyses and videos, or posts that were not published, with the reason.
Admins of the workspace and organisation admins see the audit log. Its entries cannot be changed or deleted.
Plan, quota and billing
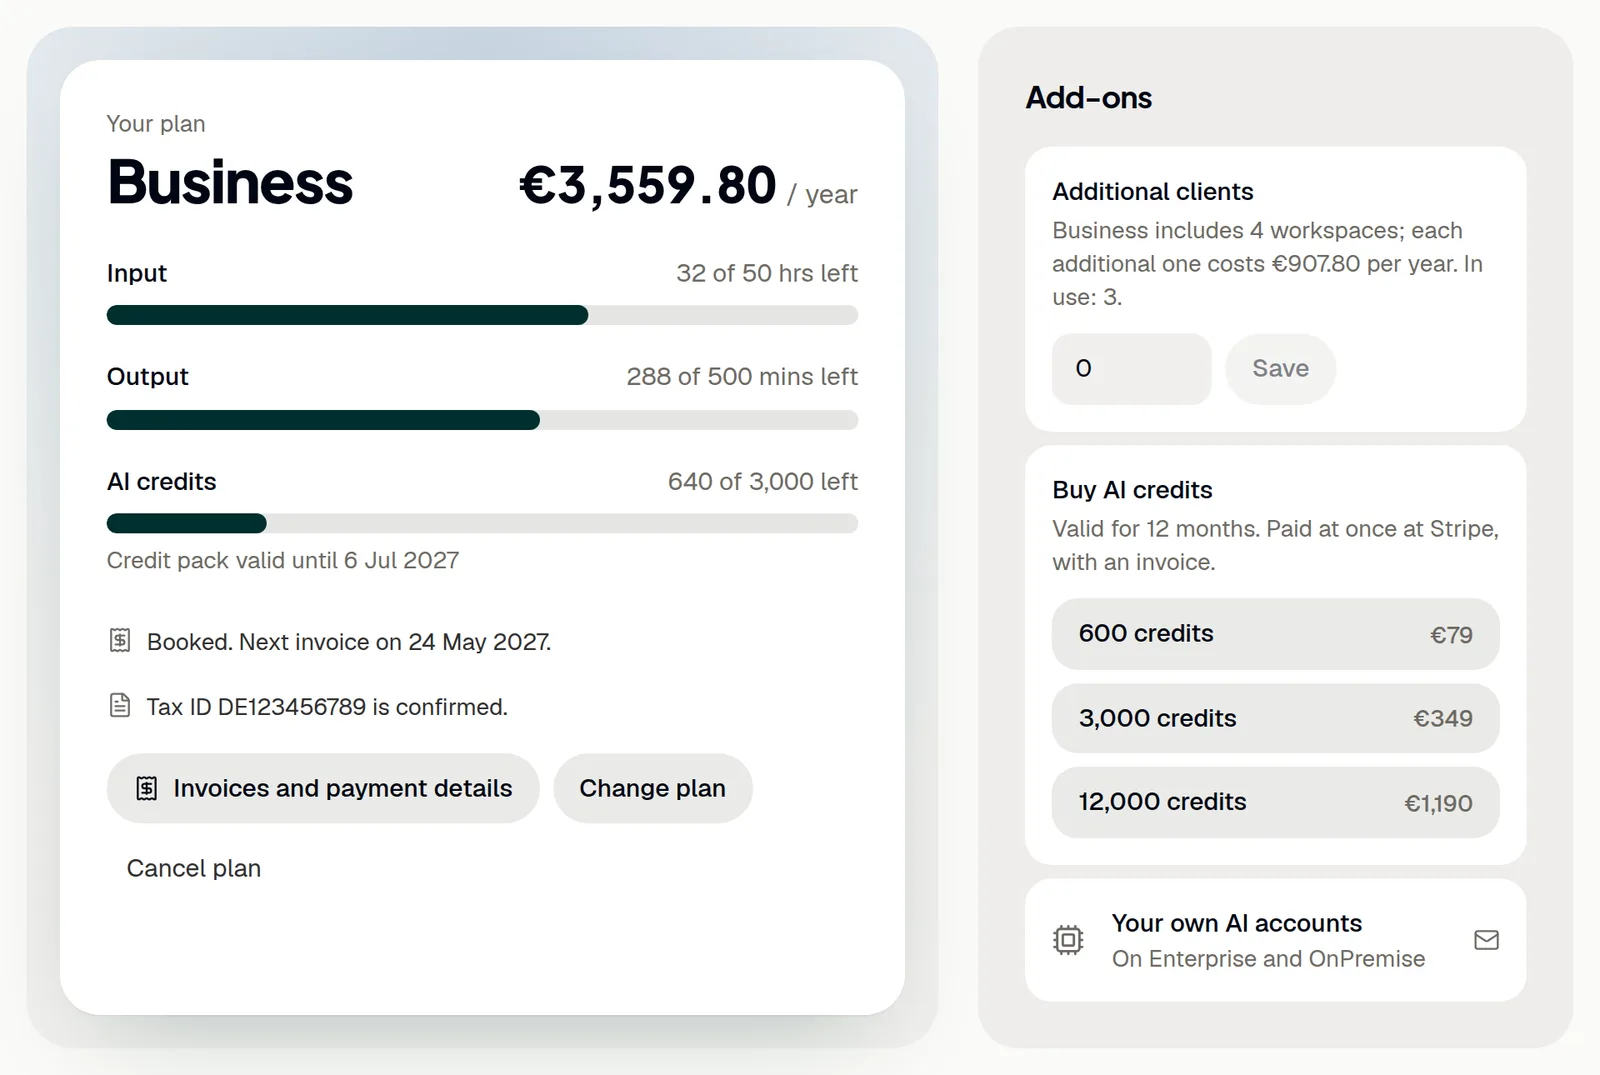
Settings → Billing shows your plan and this month's quota, which also shows at the bottom of the navigation. Input minutes count the length of each episode, output minutes the length of each finished clip video, also when a clip is rendered again. AI credits from a credit pack show with their expiry date. On Creator and Business, owners and organisation admins book and manage the plan here, with Stripe.
- Open Settings → Billing.
- During the trial, choose the plan and Monthly or Annually.
- Click Set up billing and enter the billing address and tax ID at Stripe. No payment details are asked for.
- Back in ShowBits, click Add a payment method. With one, the plan carries on after the trial without a break.
If billing was set up at sign-up, the page shows Add a payment method right away. Without a payment method, the trial ends by itself. Invoices and payment details opens Stripe with your invoices, payment method, billing address and VAT ID. On Enterprise and OnPremise, Change plan opens a prepared email to ShowBits.
Workspaces and organisation admins
An organisation can have several workspaces, one per client or brand, each with its own team, brand kits and integrations. Creator includes one workspace, Business up to four. Owners and organisation admins manage them under Settings → Workspaces.
- To add a workspace, click New workspace and enter its name under Name.
- To rename it or change its Address, click Edit. Old links keep redirecting.
- To delete a workspace, click Delete and type its name to confirm.
- To make someone an organisation admin, switch them on under Organisation admins.
Deleting removes the workspace's episodes, clips, brand kits, scheduling, integrations and stored keys at once and for good; the organisation's audit log keeps the event. The last workspace of an organisation cannot be deleted. The Owner always stays an organisation admin.
Questions
How do I change or cancel the plan?
Owners and organisation admins use Settings → Billing. Change plan switches between Creator and Business, monthly or annually; the change applies at once and is prorated. From annual to monthly you switch at the end of the term, by email. Cancel plan names the end date before you confirm, and until that date Take cancellation back keeps the plan.
How do I book additional clients or AI credits?
On Business after the trial, enter the number under Additional clients and click Save; they count from the fifth workspace on. Buy AI credits offers 600, 3,000 or 12,000 credits, paid at once at Stripe, with an invoice and valid for 12 months.
What happens when the trial ends?
Without a payment method, the workspace becomes read-only. Owners and organisation admins choose a plan there and click On to Stripe; after the payment, the workspace is open again right away.
Where do I change the organisation's name and billing details?
Under Settings → Billing → Organisation & billing details: enter the name under Organisation name and click Save name. With Stripe, the billing address, tax ID and invoice email are kept at Stripe under Invoices and payment details. Owners and organisation admins see and change these details.
Where are API tokens and webhooks?
Under Settings → API, on Enterprise and OnPremise. See REST API and API tokens and Webhooks.